Wednesday, January 1, 2014

DIY Initial Key Holder

Made this cute key holder for a friend. I love it! 
And it was really easy to make.


What I used
8"x8" piece of wood (I got a piece of wood at Michael's in the clock making section)
6"x6" piece of burlap (I got a pre-cut square from Hobby Lobby)
Furniture Nails (I used bronze-from Amazon)
7/8" Cup Hooks (I used white ones from Lowe's)
Deep Earth paint for wood (Valspar sample size from Lowe's)
Churchill Hotel paint for initial (Valspar sample size from Lowe's)
Stencil for letter of your choice (I cut my own stencil with my Silhoutte Cameo)
Brushes for painting
Tape measurer
1/16" drill bit
Drill
Sawtooth hanger


What I did
First, I painted the piece of wood the color my friend wanted. I used two coats. 

While the paint was drying, I used my Silhoutte Cameo to cut out a "C" for a stencil. I cut it out on some scrap vinyl so it would stick to the burlap. If you're using a pre-brought stencil, I suggest using some removal adhesive to keep the stencil in place. I applied the stencil to the burlap. Using a small amount of paint, I filled in the stencil by dabbing my brush, so that the paint would not spread under the stencil. 

After the initial dried, I removed the stencil. At this point the wood paint and initial paint were dry. I decided to go ahead and nail in the sawtooth hanger before I added the burlap. I nailed in the furniture nails at each corner of the burlap. 

Next, I measured across the bottom of the wood to idenify where I wanted the hooks to go. I used the 1/16" drill bit to drill pilot holes for the hooks, then screwed in the hooks.

That's it. 

It didn't take long at all to do. The painting and waiting on the paint to dry took the longest.


Sunday, October 13, 2013

DIY Tablet Stand

I saw this idea on Pinterest and thought it was such a neat way to repurpose a cutting board. The blog I looked at was Mamie Jane's. Her tablet holder is way cuter than Pottery Barn's...in my opinion. She is very clever and used a Scrabble letter holder as the slot to hold a tablet...my iPad mini fits perfectly. To keep her tablet stand upright, she used a kid's building block...which looks like it works nicely. 

For my own tablet stand, I pretty much did everything as she did except the building block for the stand. I don't have children so I didn't have those awesomely perfect blocks to use. When trying to think about what to use as my stand, I decided I wanted to be able to fold up the stand and put it away if I wanted to. I was looking around our house when my mom suggested I use a wooden spatula. I had to cut the spatula to get the right height for propping the holder up. After that, I bought a small hinge so I could fold down the spatula stand. The screws were too long for the cutting board and the spatula so I used E6000 clear adhesive.  I spray painted the front of the cutting board and the letter holder. Also used the E6000 to glue the letter holder to the cutting board. I didn't want to spray paint the spatula so I just left the back of the board and the spatula how I found them.

Here's how mine turned out!

 The app on my iPad Mini is Mark Bittman's How to Cook Everything. I have the book...so I had to get the app...when I saw it was free with the Apps Gone Free app one day.

Thursday, September 19, 2013

DIY Change Jar

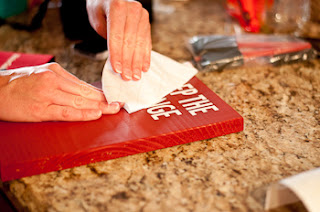
I love this project. It makes perfect sense to have one of these in a laundry room! Imagine all the change you could collect if you put it all in a jar when you are emptying pockets before washing clothes. You could just have a bowl or jar out on a shelf, but why not make your own super cute "Keep the Change" holder. These would make great gifts as well.

What you'll need:
7x11 piece of wood
Paint
Clear sealant
Stencil letters/vinyl cut letters
Paint brush
Sawtooth hanger
Nails
Mason jar
Pipe clamp sized to fit mason jar
Flathead screwdriver (or a dime)
Sander (optional-for distressed look)

What you'll do:
First, I painted the piece of wood and let it dry.


While the paint was drying, I used my Silhouette to cut out "KEEP THE CHANGE" on vinyl. Stencils can be used if you don't have a cutting machine.

Next, I applied the vinyl. 

To make sure I put the letters in the right place, I laid the transfer tape down on the wood and placed the jar where I wanted it. 


Then I applied the letters and removed the transfer tape.


After the letters were on, I painted a coat of clear sealant and let it dry.


After the sealant was dry, I flipped the piece of wood over and nailed in place a sawtooth hanger.


Time to add the most important part, the jar! To attach the jar, I first positioned the clamp with the open and closing part on the side where I could easily access it to loosen and tighten it. This is important because it's how you remove the jar to empty it.


Once I had the clamp in the position I wanted, centered with the letters and with a little room to spare at the bottom of the wood, I took a nail (the ones that go with the sawtooth hangers) and nailed it into one of the slits in the clamp. One wasn't enough. The jar slid side-to-side, so I put another nail in the same slit and make the jar a little more snug.


After I got the clamp nailed in place, I secure the jar in the clamp using a flathead screw driver (or a dime) to tighten the clamp.


And there you have it! A cute and functional piece of wall decor for the laundry room, or wherever you want to "Keep the Change"


To add a distressed look, I took a hand sander and went around the edges to take off some of the paint.


Monday, September 9, 2013

DIY Coasters

It turns out, I'm somewhat addicted to Pinterest. Follow me on Pinterest and you'll see what I mean. I've found lots of DIY projects. I'm slowly, but surely, tackling my list of DIY projects. Time for DIY Coasters!

I thought coasters would make cute little gifts, especially if they are personalized. They are really easy and fun to make. I made these coasters for a friend. The colors match the colors in her living room curtains. The fish paper you'll see is what I used for two coasters for my friend's husband to have his own. She loved the pretty colors to match her curtains and he, being an outdoorsman, loved his fish themed coasters.

I've seen several How-to Blogs on making these coasters. Here's what I did.

What you'll need:
4"x 4" Ceramic Tiles (Lowe's)
Scrapbook Paper (Hobby Lobby)
Mod Podge (Hobby Lobby)
Self-stick Rubber Pads (I got mine at Target)
Clear Sealer (Hobby Lobby)
*I just listed where I got my stuff. You can find these things at several different stores*


What you'll do:
Clean your tile with an alcohol wipe.
Add a layer of Mod Podge to the tile then place your paper on the tile, centering it.
Next, I used the Mod Podge squeegee to rub the paper down onto the tile.
Let it dry for 10-15 minutes.

Next, add a coat of Mod Podge over the paper. Let it dry for 15-20 minutes.
Add another coat and let dry. 
I added three coats of Mod Podge, but you can do more or less if you choose.
After the last coat of Mod Podge is completely dry, it's time to add the sealant.
I brushed on a layer of sealant and let it dry 15-20 minutes, then added another coat.
I also did three coats of the sealant.


After everything was nice and dry, I flipped the tile over and added a Self-stick Rubber Pad to each corner.

Ta Da! You've just made yourself some cute coasters!


Sunday, October 7, 2012

Gone Batty!

They had been looking forward to making their "Halloween shirts" for a week.

The day finally arrived! We made these shirts today and had a blast doing it.

After the one hundredth time of being asked, "Can I touch it!? Our shirts dry?! Can we wear them?!", I used a hair dryer to speed up drying.

I got the idea from Michael's. You can get instructions and the bat template at
http://m.michaels.com/Gone-Batty-T-Shirt/e08572,default,pd.html

Instead of regular white and yellow fabric paints, I used glow-in-the-dark white and yellow fabric paint.


They LOVE these shirts! To make the Glow-in-the-Dark paint REALLY glow, we would shine a bright flashlight on the glow-in-the-dark parts. So much fun!

A few weeks after making the shirts, I found a PERFECT picture frame at Target!